 Pin it
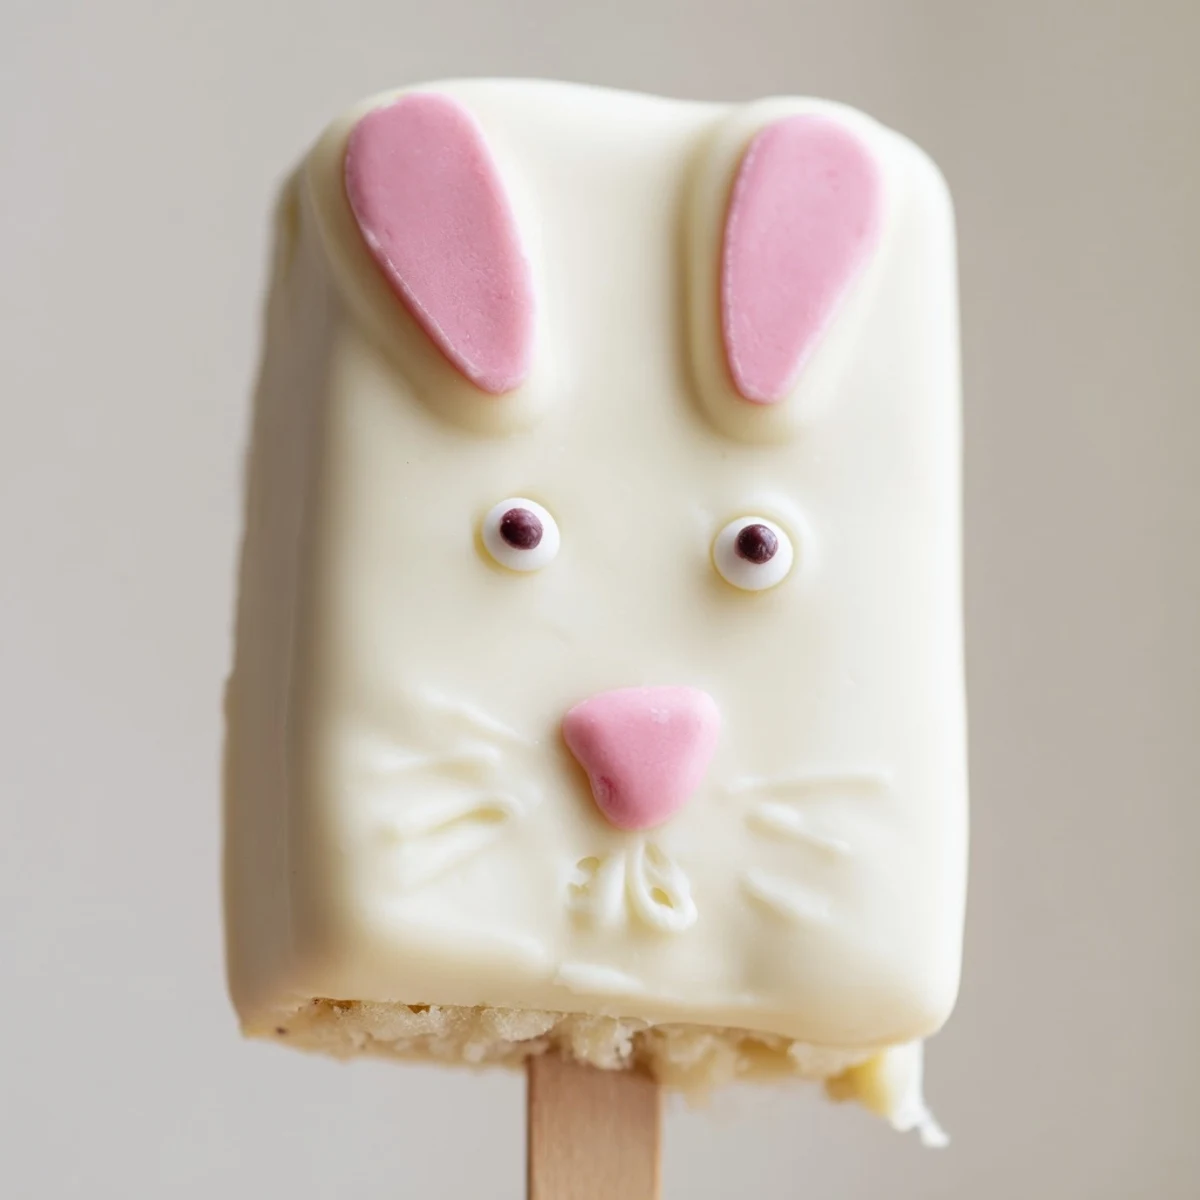
 These delightful bunny-shaped treats combine moist vanilla cake with rich white chocolate coating, creating festive Easter desserts that are as fun to make as they are to eat. The cake mixture blends vanilla cake crumbs with cream cheese and butter for the perfect dough consistency, then gets dipped in melted white chocolate and decorated with colorful touches.
The process is straightforward—mix, shape, chill, dip, and decorate—making it an enjoyable activity for families. Each cakesicle yields a moist, creamy interior encased in smooth white chocolate that can be customized with sprinkles, candy eyes, and fondant bunny ears.
My niece exploded with tiny gasps when she saw these bunny cakesicles in the Easter basket last year, clutching two in her sticky little hands like she discovered treasure. I stumbled upon the idea completely by accident while trying to salvage a slightly dry vanilla cake that nobody wanted to eat plain. The white chocolate coating transformed everything into something magical and festive. Now they are the most requested item at every spring gathering.
Last Easter morning, my kitchen counter became an assembly line with my three youngest cousins all sporting chocolate smeared cheeks and determination. They argued over who got to add the pink noses and whose bunny had the straightest ears. The best part was watching them proudly present their creations to the adults like award-winning pastry chefs.
Ingredients
- Vanilla cake crumbs: The foundation of these treats, whether from a homemade cake or store-bought cupcakes
- Cream cheese: Adds moisture and helps bind the crumbs together into a workable dough
- Unsalted butter: Creates richness and helps the mixture hold its shape when formed
- Powdered sugar: Provides just enough sweetness to balance the tangy cream cheese
- Vanilla extract: Enhances all the flavors and adds that familiar comforting taste
- White chocolate: Creates the smooth coating and adds creamy sweetness to every bite
- Edible gel food coloring: Brings the bunny faces to life with pink noses and colorful details
- Cakesicle sticks: Transforms these treats into festive handheld Easter treats
- Sprinkles and decorations: Let everyone personalize their own bunny with candy eyes and fun toppings
Instructions
- Mix the cake mixture:
- Combine the cake crumbs, cream cheese, butter, powdered sugar, and vanilla extract in a medium bowl until the mixture holds together like soft dough.
- Shape the bunnies:
- Divide the mixture into eight equal portions and form each into a flattened oval that resembles a bunny face.
- Add the sticks:
- Press a cakesicle stick about halfway into each shaped bunny, then refrigerate for twenty to thirty minutes until firm.
- Melt the coating:
- Heat the white chocolate in thirty second intervals in the microwave, stirring between each burst until completely smooth.
- Coat the cakesicles:
- Dip each chilled cake pop into the melted white chocolate, tapping gently to remove any excess coating.
- Add the decorations:
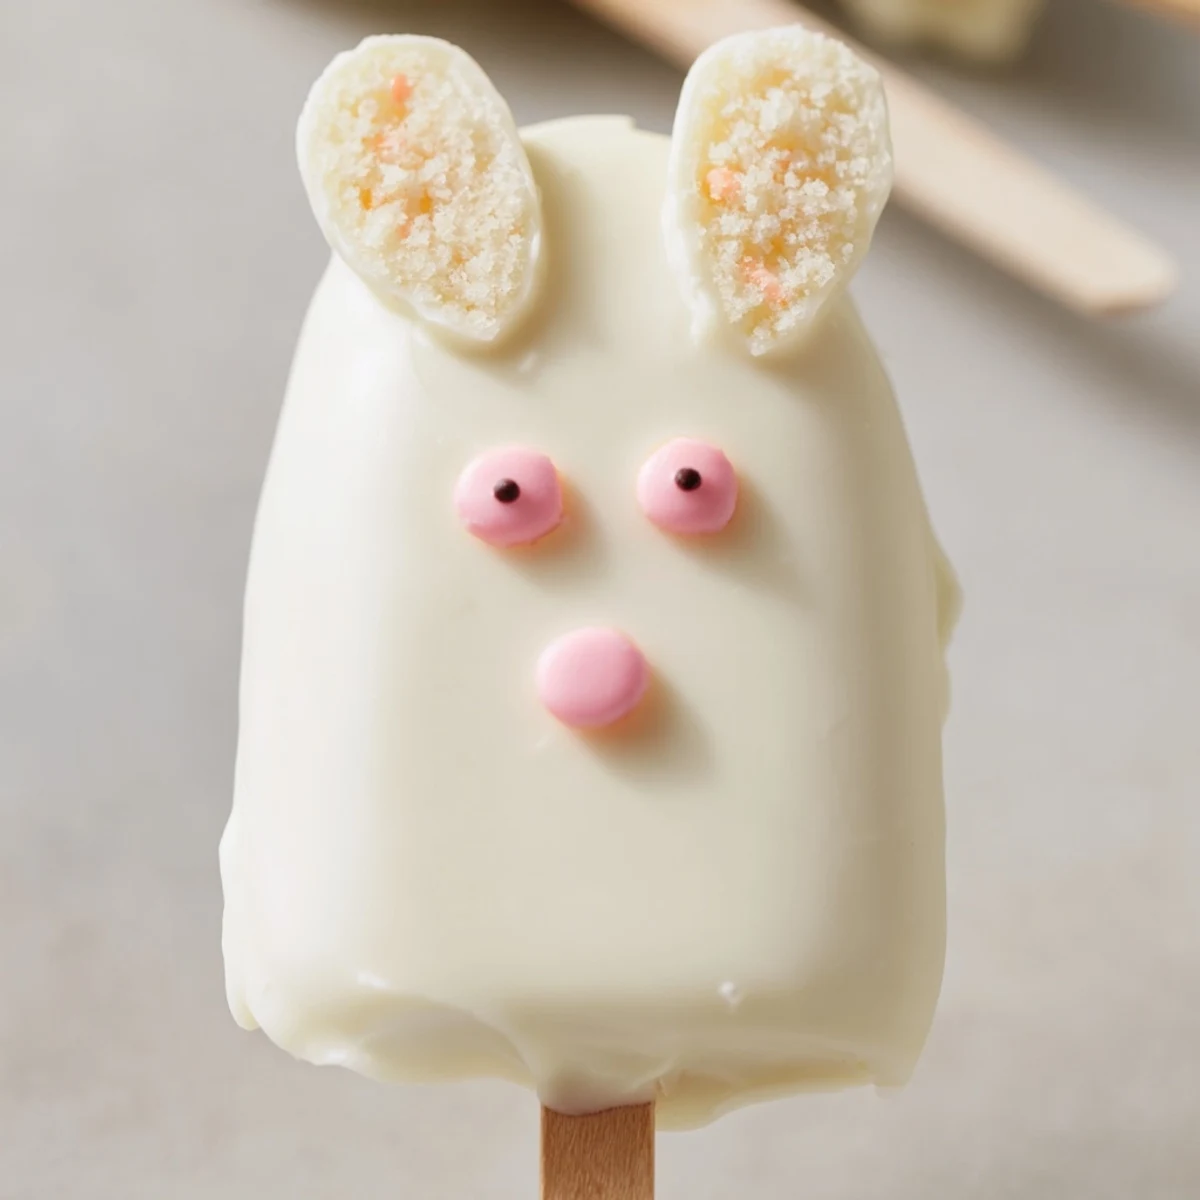
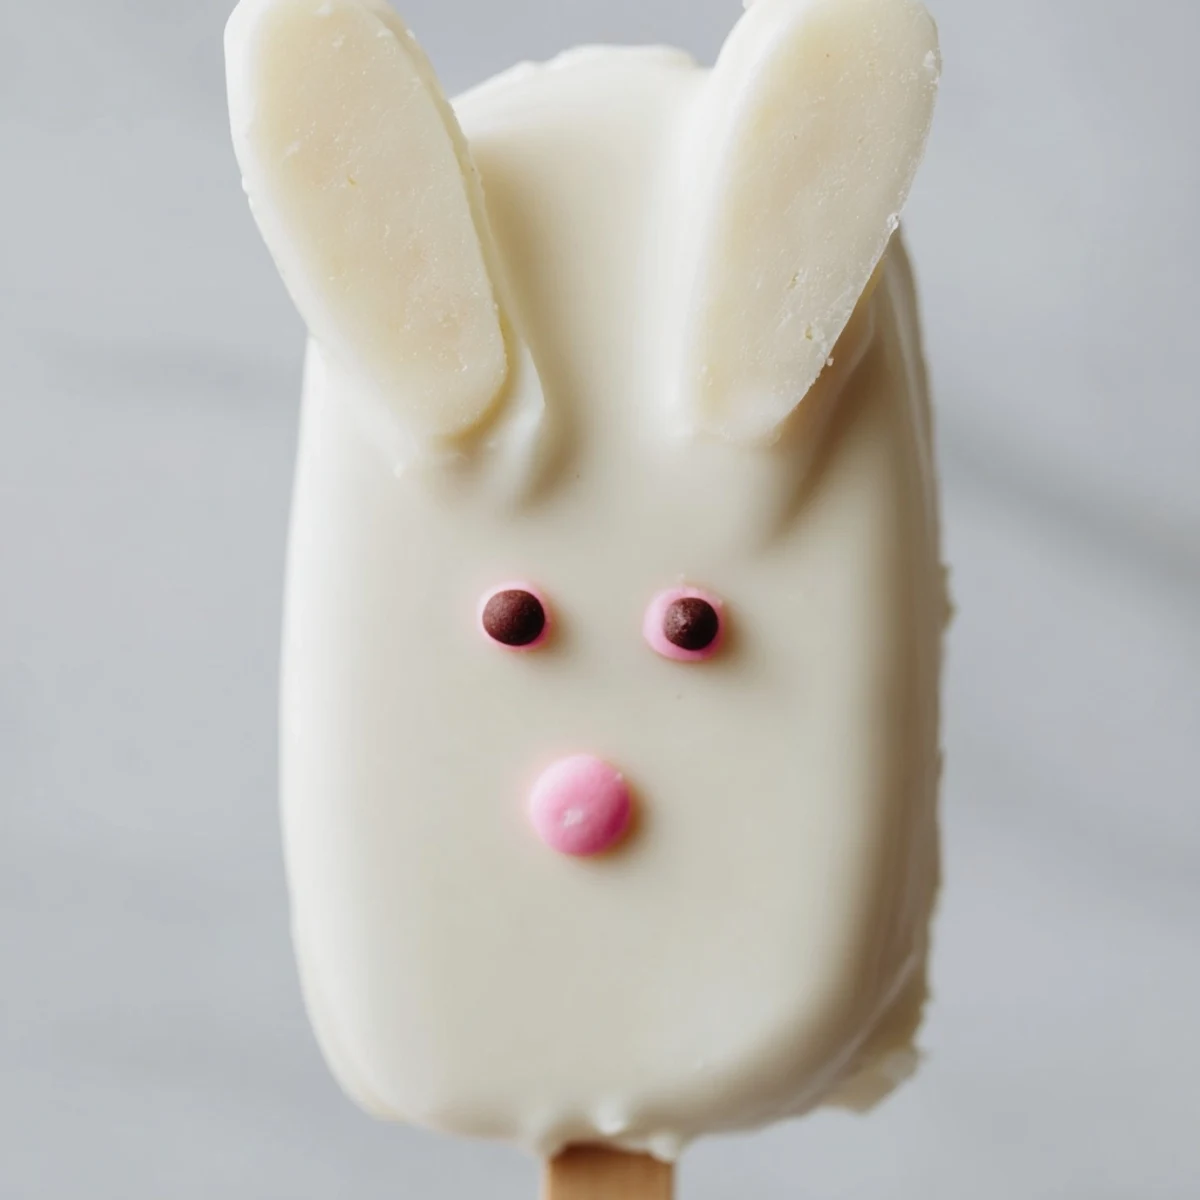
- Place the coated cakesicles on parchment paper and immediately add candy eyes, sprinkles, or fondant ears before the chocolate sets.
- Set and serve:
- Allow the chocolate to harden at room temperature or in the refrigerator briefly, then add any final details with food coloring gel.
 Pin it
 These treats have become the centerpiece of our Easter dessert table, with guests always asking which bunny belongs to which creator. The anticipation of seeing whose design won the most votes has turned into our favorite family tradition.
Making Different Flavors
Experiment with chocolate cake crumbs for a classic combination that pairs beautifully with white chocolate. Lemon cake creates a bright spring flavor that feels especially fresh during the Easter season.
Decoration Ideas
Pretzel sticks make adorable floppy ears when attached with a dot of melted chocolate. Fondant shapes allow for more detailed facial expressions and personalized designs for each family member.
Storage And Serving
These cakesicles stay fresh in an airtight container in the refrigerator for up to three days. Serve them standing upright in a decorative jar or Easter basket for an impressive display.
- Bring them to room temperature for about ten minutes before serving for the best texture
- Package them individually in clear bags tied with pastel ribbon for adorable party favors
- Make the cake shapes a day ahead and store them uncovered in the fridge before dipping
 Pin it
 These bunny cakesicles bring a certain magic to Easter that store-bought treats simply cannot match. Watching faces light up when they spot their personalized bunny makes every minute of preparation completely worthwhile.
Recipe FAQs
- → How far in advance can I make these cakesicles?
-
You can prepare these cakesicles up to 3 days in advance when stored properly in an airtight container in the refrigerator. The coating remains smooth and the interior stays moist throughout this period. For best results, add delicate decorations like candy eyes and fondant features closer to serving time to prevent them from softening or losing their shape.
- → Can I freeze these bunny cakesicles?
-
Yes, these freeze beautifully for up to 1 month. Place them in a single layer on a baking sheet until frozen solid, then transfer to an airtight container or freezer bag with parchment paper between layers. Thaw in the refrigerator overnight before serving. Note that some decorations like sprinkles may lose their crunch after freezing.
- → What other cake flavors work well for these Easter treats?
-
While vanilla cake provides a classic canvas, lemon cake adds bright spring flavor that complements the white chocolate beautifully. Chocolate cake creates a striking contrast, and strawberry or funfetti varieties add festive color. Just ensure your cake crumbs are finely crumbled and not overly moist before mixing with the binding ingredients.
- → Why is my white chocolate coating seizing while melting?
-
White chocolate is sensitive to heat and moisture. Use 30-second intervals in the microwave, stirring thoroughly between each. If your chocolate seizes (becomes grainy), try adding a teaspoon of vegetable oil or coconut oil and stirring vigorously. Avoid getting any water into your chocolate, as even a few drops can cause seizing.
- → What alternatives work for bunny ears if I don't have fondant?
-
Pretzel sticks make excellent structural ears when broken in half and dipped in white chocolate or pink candy melts. You can also use sliced almonds, white chocolate cutouts piped onto parchment paper, or even heart-shaped sprinkles positioned as ears. Modeling chocolate or marzipan also work well and can be tinted with food coloring.
- → How do I prevent the sticks from falling out during dipping?
-
After inserting the sticks into the shaped cake mixture, refrigerate for at least 20-30 minutes until the cake is firm. The cold helps the cake grip the stick. When dipping, hold the stick firmly and tap your wrist gently to remove excess coating rather than shaking the stick itself. Setting the coated cakesicles upright in a glass or foam block while drying also helps stabilize the stick position.