 Pin it
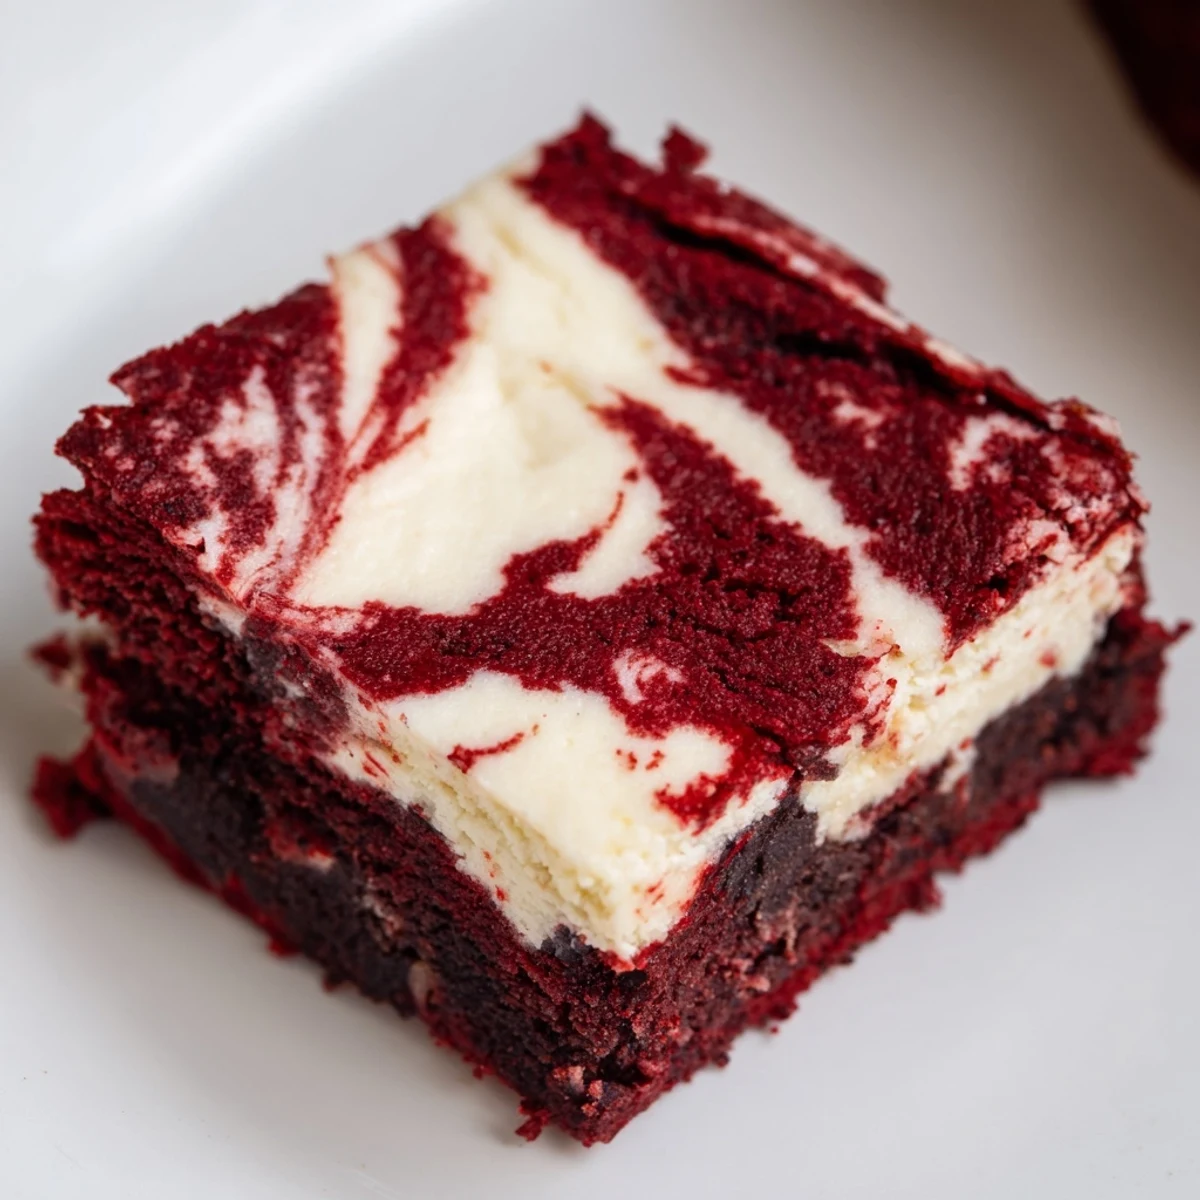
 These stunning red velvet cheesecake brownies combine the best of both worlds - rich, fudgy red velvet chocolate base swirled with tangy cream cheese layering. The marbled appearance makes them visually impressive for gatherings, while the contrasting textures create an irresistible bite. Perfect for holidays, Valentine's Day, or whenever you want to elevate your chocolate dessert game.
The first time I made these, my roommate walked into the kitchen and asked if I was okay because there was bright red batter everywhere. I had gotten a little too enthusiastic with the food coloring bottle and somehow managed to turn my apron, a dishtowel, and part of the countertop crimson. But when those brownies came out of the oven with their gorgeous swirl pattern, every messy second was absolutely worth it.
I brought a batch to my office potluck last year, and honestly, watching peoples reactions when they bit into them was the highlight of my month. Someone actually asked if I had bought them from a bakery because the swirl looked too professional to be homemade. That moment of slightly smug satisfaction while explaining they were from scratch? Absolutely delicious in its own right.
Ingredients
- Unsalted butter (1/2 cup, melted): I always melt mine in the microwave in 15-second bursts to prevent it from getting too hot and separating
- Granulated sugar (1 cup + 1/4 cup): Regular white sugar works perfectly here, but make sure to measure carefully since too much can make the brownies cakey instead of fudgy
- Large eggs (3 total): Room temperature eggs incorporate so much better into both batters, so set them out about 20 minutes before you start
- Vanilla extract (1 tablespoon + 1/2 teaspoon): Do not skimp here, the vanilla really needs to stand up to the cocoa and cream cheese flavors
- Red food coloring (1 tablespoon): Gel coloring gives a deeper red without adding excess liquid, but liquid works fine too
- All-purpose flour (2/3 cup): Spoon and level your flour rather than scooping directly, which can pack it down and make brownies dry
- Unsweetened cocoa powder (2 tablespoons): Dutch-processed cocoa will give you that deep, almost-black red color instead of brownish-red
- Salt (1/4 teaspoon): Just a pinch enhances the chocolate flavor and balances the sweetness
- Cream cheese (8 oz, softened): Leave it out for at least an hour, and do not try to microwave soften it or you will get weird lumps
Instructions
- Get your oven and pan ready:
- Preheat to 350°F and line an 8x8 inch pan with parchment paper, leaving those overhangs like little handles to lift the brownies out later.
- Make the red velvet batter:
- Whisk the melted butter and sugar until they are completely smooth and no sugar crystals remain, then add the eggs, vanilla, and food coloring until you have this gorgeous glossy red mixture.
- Add the dry ingredients:
- Sift in your flour, cocoa, and salt, then fold with a spatula just until the flour disappears overmixing makes tough brownies.
- Prep your swirl batter:
- Set aside 1/4 cup of that red batter, then spread the rest evenly in your prepared pan like you are frosting a cake.
- Whip up the cheesecake layer:
- Beat that softened cream cheese with sugar until it is perfectly smooth, then mix in the egg and vanilla until creamy.
- Layer it up:
- Pour the cheesecake mixture right over the brownie base and smooth it to the edges.
- Create the swirl:
- Drop spoonfuls of your reserved red batter all over the cheesecake layer, then run a knife through them in a figure-eight pattern without over-swirling.
- Bake to perfection:
- Bake for 33 to 36 minutes until the center is just set and a toothpick comes out with moist crumbs but not wet batter.
- The hard part patience:
- Cool completely in the pan, then lift out using those parchment handles and cut into squares.
 Pin it
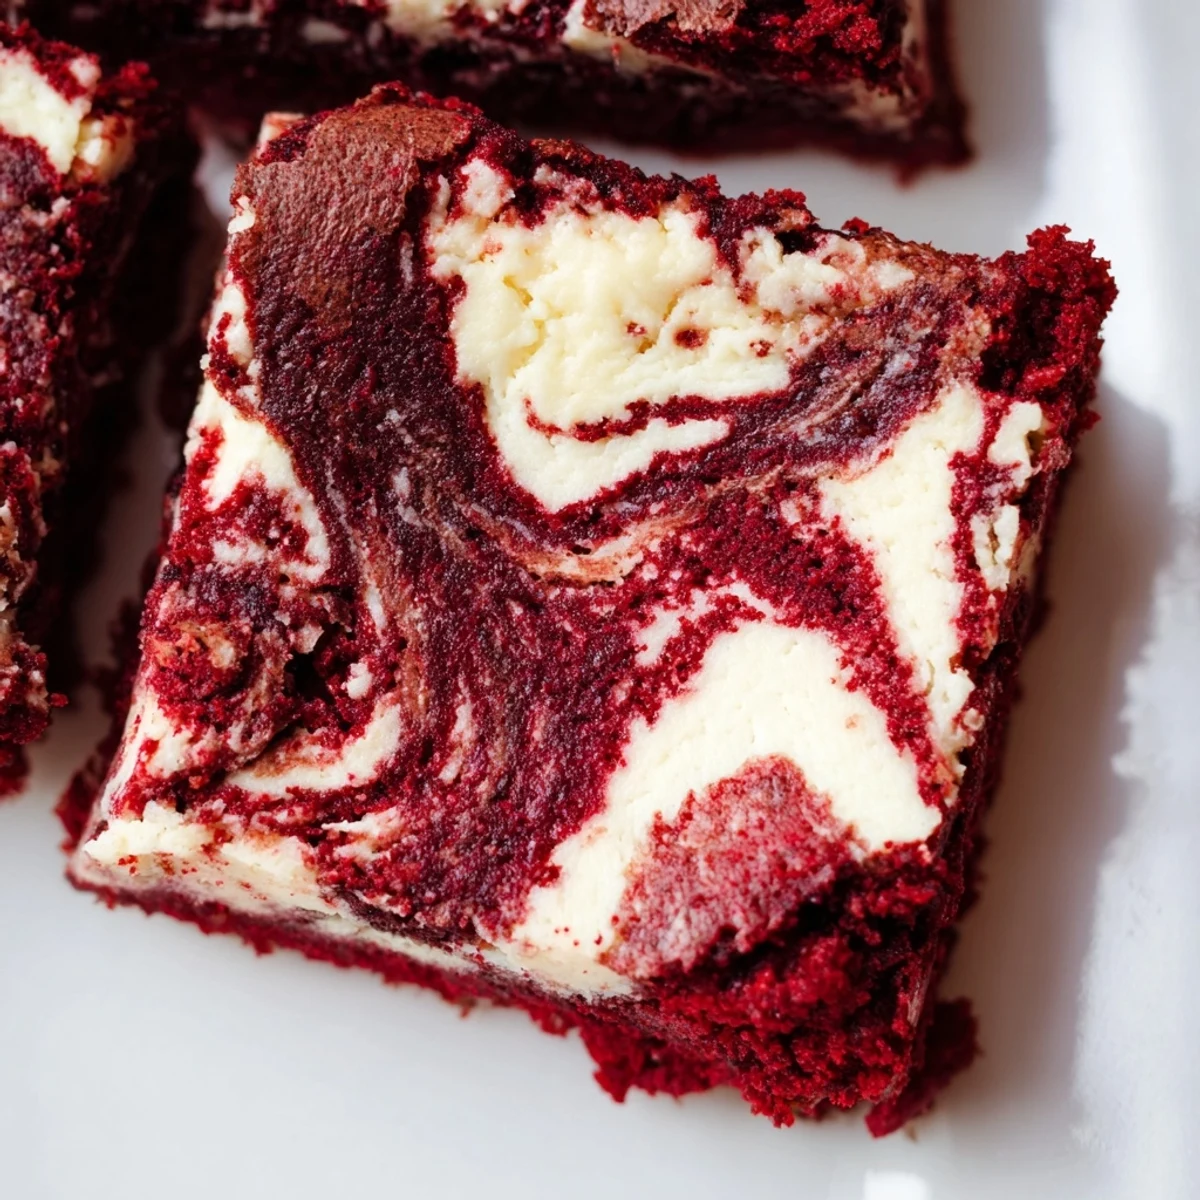
 My cousin requested these for her birthday instead of cake, and honestly, I get it. There is something about cutting into that marbled pattern that feels festive and special, like you made something truly extraordinary from the most ordinary ingredients.
Getting That Perfect Swirl
The secret to those restaurant-worthy swirls is working quickly while both batters are still slightly warm and fluid. I learned the hard way that if your cream cheese mixture gets too cold, it will not swirl nicely and you will end up with distinct layers instead of that beautiful marbled effect.
Pan Size Matters
Do not be tempted to use a 9x9 inch pan unless you prefer thinner, cakey brownies. The 8x8 size gives you that perfect thick, fudgy texture where the cheesecake and brownie layers can each shine without competing for attention.
Make-Ahead Magic
These actually taste better the next day after the flavors have had time to meld together. I like to make them the evening before I need them and let them chill overnight in the refrigerator, then bring them to room temperature for about 30 minutes before serving.
- Wrap the entire uncut slab in plastic wrap and foil for freezing up to 2 months
- For clean cuts, wipe your knife with a damp cloth between each slice
- Serve them slightly chilled if you want the cheesecake layer to really pop
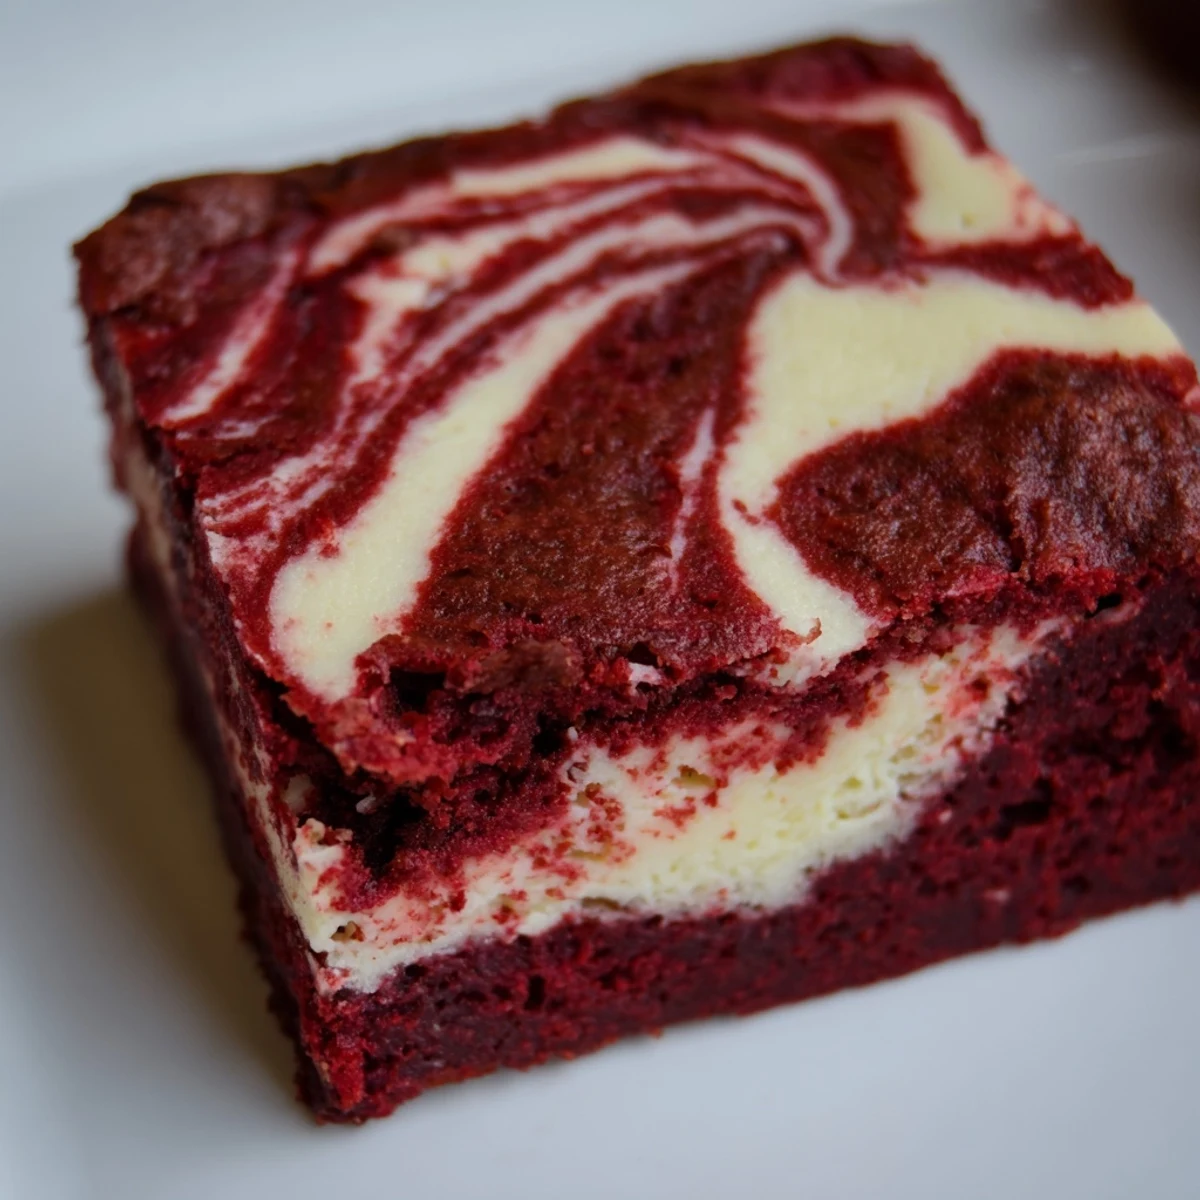 Pin it
 Every time I pull these out of the oven and see that beautiful marbled top, I still get a little thrill of excitement. Hope these bring some joy to your kitchen too.
Recipe FAQs
- → How do I know when red velvet cheesecake brownies are done baking?
-
Insert a toothpick into the center - it should come out with a few moist crumbs but not wet batter. The edges should be set while the center has a slight wobble. Avoid overbaking to maintain the fudgy texture.
- → Can I make these brownies ahead of time?
-
Yes, these brownies actually improve after chilling. Prepare them up to 2 days in advance and store in the refrigerator. The flavors meld together and the texture becomes perfectly dense and creamy.
- → Why did my cheesecake swirl sink into the brownie batter?
-
This happens if the brownie batter is too thin or the cheesecake layer is too heavy. Make sure your cream cheese is softened but not melted, and avoid overmixing the brownie batter which can create air pockets.
- → Can I use natural food coloring instead of red dye?
-
Beet juice or pomegranate juice can work, though the color may be more muted. Gel food coloring provides the most vibrant red hue without thinning the batter like liquid food coloring might.
- → Should I serve these chilled or at room temperature?
-
Both ways work beautifully. Chilled brownies have a firmer, cheesecake-like texture while room temperature highlights the fudgy brownie qualities. Remove from fridge 30 minutes before serving for a softer bite.
- → How do I get perfect marble swirls?
-
Drop spoonfuls of reserved batter randomly over the cheesecake layer. Gently drag a knife or skewer through both layers in an S-pattern, being careful not to over-swirl which can muddy the marbling effect.