 Pin it
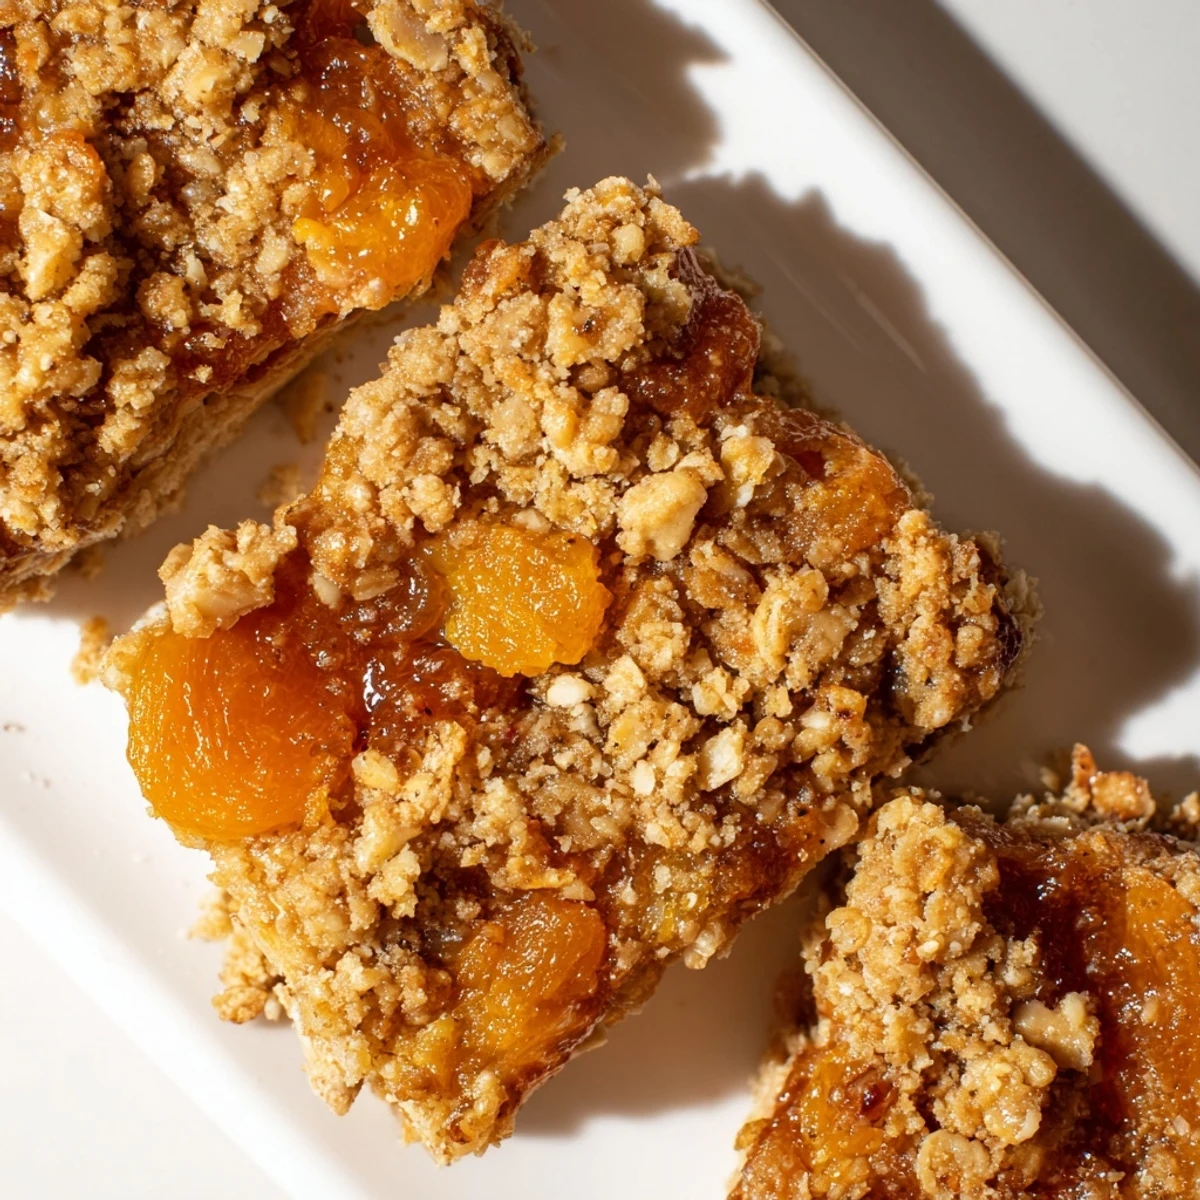
 These chewy, golden bars combine the natural sweetness of dried apricots with the heartiness of gluten-free rolled oats and almond flour. The apricot filling simmers into a jammy consistency while the crumbly oat topping bakes to perfection.
Press two-thirds of the oat mixture into your pan, spread the fruit layer, then scatter the remaining crumbs across the top. After 25-30 minutes in the oven, you'll have bars that are tender inside, slightly crisp on top, and filled with sunny apricot flavor.
Great for meal prep, lunchboxes, or afternoon snacking. Swap in figs or dates for the apricots if you prefer, or make them vegan with flax egg and plant-based butter.
The kitchen smelled like warm maple and citrus the first time I made these bars. My daughter had just been diagnosed with celiac disease, and we were both mourning the loss of her favorite morning pastries. When these emerged from the oven golden and fragrant, she took one bite and quietly said these are better than before. That moment changed everything about how I approach gluten-free baking.
Last summer, I brought a batch to a neighborhood potluck assuming they would be a safe backup option. By the time I reached the dessert table, the pan was empty and three different neighbors had texted me for the recipe. Watching people genuinely excited about gluten-free treats feels like a small victory every single time.
Ingredients
- 2 cups gluten-free rolled oats: Toast these briefly in a dry pan before mixing to deepen their nutty flavor and improve texture
- 1 cup almond flour: Adds moisture and richness that wheat flour usually provides, plus a subtle sweetness
- 1/2 cup light brown sugar, packed: The molasses content creates a softer, more tender crumb than white sugar
- 1/2 teaspoon ground cinnamon: Warming spice that bridges the gap between the oats and bright apricot filling
- 1/2 teaspoon baking soda: Helps the bars achieve a slight lift rather than staying dense
- 1/4 teaspoon salt: Balances the sweetness of the maple, honey, and dried fruit
- 1/2 cup unsalted butter, melted and cooled: Use room temperature butter so it incorporates smoothly without scrambling the egg
- 1/4 cup pure maple syrup: Real maple syrup adds depth and moisture that artificial substitutes cannot replicate
- 1 large egg, room temperature: Binds everything together while contributing structure
- 1 teaspoon pure vanilla extract: Pure extract makes a noticeable difference in the final flavor profile
- 1 1/2 cups dried apricots, chopped: Look for plump, soft apricots rather than dried ones that feel like leather
- 1/3 cup orange juice: Freshly squeezed prevents the filling from becoming cloyingly sweet
- 2 tablespoons honey: Helps the apricot mixture achieve that perfect jammy consistency
- 1 teaspoon lemon zest: Brightens the entire filling and cuts through the rich oat base
Instructions
- Preheat your oven:
- Set your oven to 350°F (175°C) and line an 8-inch square baking pan with parchment paper, letting the edges hang over two sides like handles
- Simmer the filling:
- Combine chopped apricots, orange juice, honey, and lemon zest in a small saucepan over medium heat, stirring occasionally for 8 to 10 minutes until the fruit breaks down into a thick, spreadable jam
- Mix the dry base:
- In a large bowl, whisk together oats, almond flour, brown sugar, cinnamon, baking soda, and salt until uniformly combined
- Prepare the wet mixture:
- Whisk the melted butter, maple syrup, egg, and vanilla extract in a separate bowl until smooth and emulsified
- Combine everything:
- Pour the wet ingredients into the dry mixture and stir until the dough comes together in a crumbly, cohesive mixture that holds its shape when pressed
- Form the bottom layer:
- Press about two-thirds of the oat mixture firmly and evenly into the prepared pan using the back of a measuring cup or your fingers
- Add the fruit layer:
- Spread the cooled apricot filling over the pressed base, leaving a small border around the edges
- Top with remaining crumbs:
- Crumble the remaining oat mixture over the apricot layer and gently press down so the topping adheres without compacting it too tightly
- Bake until golden:
- Bake for 25 to 30 minutes until the top is golden brown and the edges are slightly caramelized
- Cool completely:
- Let the bars cool completely in the pan before using the parchment handles to lift them out and slicing into 12 squares
 Pin it
 My mother-in-law, who has been skeptical of gluten-free baking for years, actually asked me to make these for her bridge club last month. Watching her serve them to her friends with genuine pride felt like crossing an invisible finish line I did not even know existed.
Making The Filling Your Own
One rainy Sunday, I discovered that swapping figs for apricots and adding a pinch of cardamom created something entirely unexpected and wonderful. The filling possibilities are endless once you understand the basic ratio of fruit to liquid sweetener. Dried cherries with almond extract became a holiday favorite, while dates and orange blossom water transported us straight to a Moroccan market.
Texture Secrets
After dozens of batches, I learned that slightly underbaking these bars yields the most delicious chewy texture, while extending the time creates a crispier, cookie-like result. The difference between just right and overbaked is often just three minutes. I now set my timer for the minimum time and check every few minutes after that.
Storage And Serving
These bars actually improve after a day in the tin as the flavors meld and the texture becomes more cohesive. I often wrap individual bars in parchment paper and freeze them for rushed weekday mornings.
- Pop a frozen bar in the microwave for 15 seconds and it tastes freshly baked
- Crumble leftover bars over yogurt for an instant parfait topping
- Wrap them in brown parchment tied with twine for a thoughtful homemade gift
 Pin it
 There is something deeply satisfying about watching people enjoy a recipe born from necessity rather than choice. These bars started as a compromise but ended up becoming a staple in our kitchen, gluten-free or not.
Recipe FAQs
- → Can I use steel-cut oats instead of rolled oats?
-
Steel-cut oats won't work well in this recipe. Their coarse texture and longer cooking time would result in tough, gritty bars. Stick with gluten-free rolled oats for the best chewy texture and proper binding.
- → How do I know when the bars are done baking?
-
Look for a golden-brown color across the top surface. The edges should be slightly pulling away from the pan, and the center will feel set rather than jiggly. Remember that they'll firm up as they cool, so don't overbake waiting for a crispy texture.
- → Can I make these without almond flour?
-
Substitute an equal amount of gluten-free all-purpose flour or additional oat flour (ground from rolled oats). The texture may be slightly less tender, but the bars will still hold together beautifully.
- → Should I refrigerate these bars?
-
Refrigeration isn't necessary but can extend freshness to about a week. Room temperature storage in an airtight container keeps them perfectly soft for up to 5 days. If you prefer a firmer texture, refrigerating helps.
- → Can I freeze these oatmeal bars?
-
Absolutely. Wrap individual bars in plastic wrap, then store in a freezer-safe bag for up to 3 months. Thaw at room temperature for about an hour, or warm gently in the microwave for that fresh-baked texture.
- → What's the best way to get clean cuts when slicing?
-
Let the bars cool completely—ideally at room temperature for 2-3 hours. The fruit layer needs time to set. Use a sharp knife and wipe it clean between cuts. For perfect squares, chilled bars (30 minutes in the fridge) slice even cleaner.